RecyclyERP has two ways to download a list as a spreadsheet. Basic Export gives you a quick copy of the list exactly as it is on screen. Advanced Export lets you choose the records and the columns, including fields from linked records, and save your choice for next time. Both are on the lists throughout RecyclyERP: the Address Book, Inbound Orders, Collections, Sales Orders, Items & Lots and more.
Which one to use
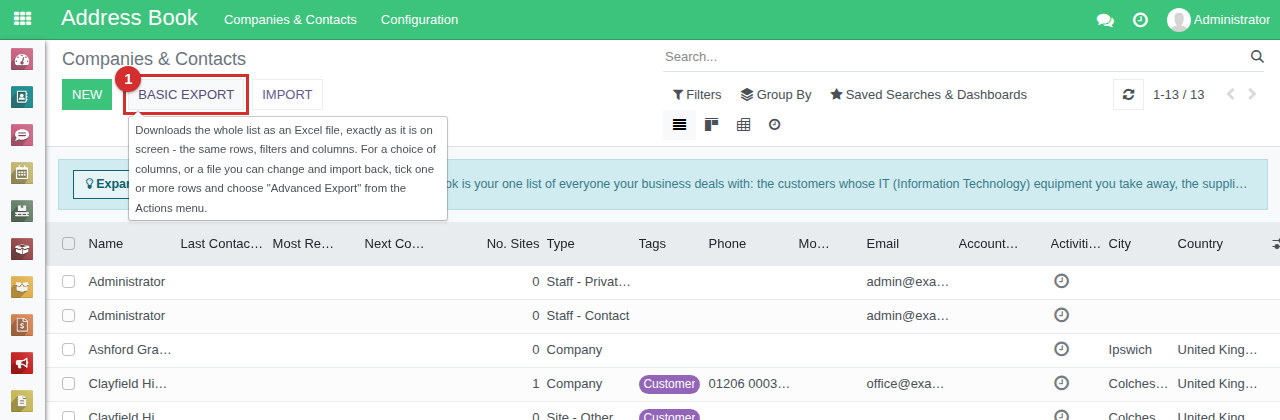
- Basic Export - one click, for a quick copy of what you can see: the whole list, with the same rows, filters and columns as on screen.
- Advanced Export - when you want particular records, particular columns, or fields from a linked record, such as each contact's company phone number. It is also the only way to get a file you can change and import back: see Updating Existing Data using a Data Import (opens in a new tab).
Basic Export
With no rows ticked, click Basic Export (1) at the top of the list. It downloads the whole list as an Excel file: every record your search and filters show, not just the first page, with the list's own columns. To change what goes in the file, search or filter the list first. The button is only there while no rows are ticked.
Advanced Export: a worked example
Here, a spreadsheet of everyone in the Address Book, with each contact's email and their company's phone number.
1. Tick the records
Advanced Export downloads only the rows you tick. Tick the box beside each one you want, or tick the box at the top of the list (1) to tick every row on the page. When the list runs to more than one page, a Select all link (2) then appears: click it to tick every record, on every page.
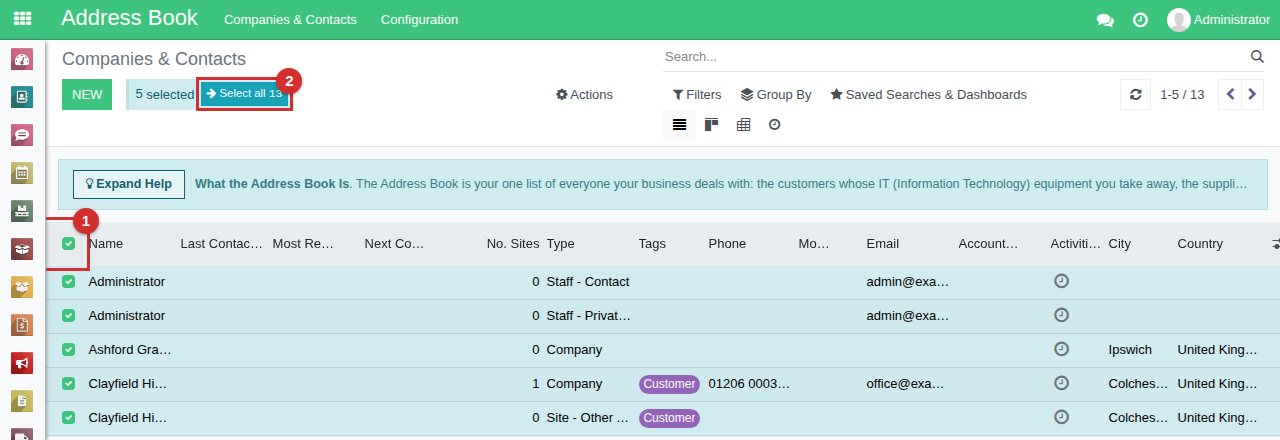
Then choose Actions > Advanced Export. The How Advanced Export Works panel at the top of the window sums up what follows.
2. Choose the columns
Fields to export, on the right, starts with the list's own columns. Take out any you do not want with the bin beside it, and add others with the + beside them under Available fields. Type part of a field's name in the Search box (1) to find it quickly. Here the columns are Name, Email and Related Company, the company each contact belongs to.
3. Add a field from a linked record
Some fields point at another record: a contact's Related Company is a record of its own, with its own phone number. Click the arrow beside such a field to show the fields inside it, then add the one you want with its + - here Related Company/Phone (2).
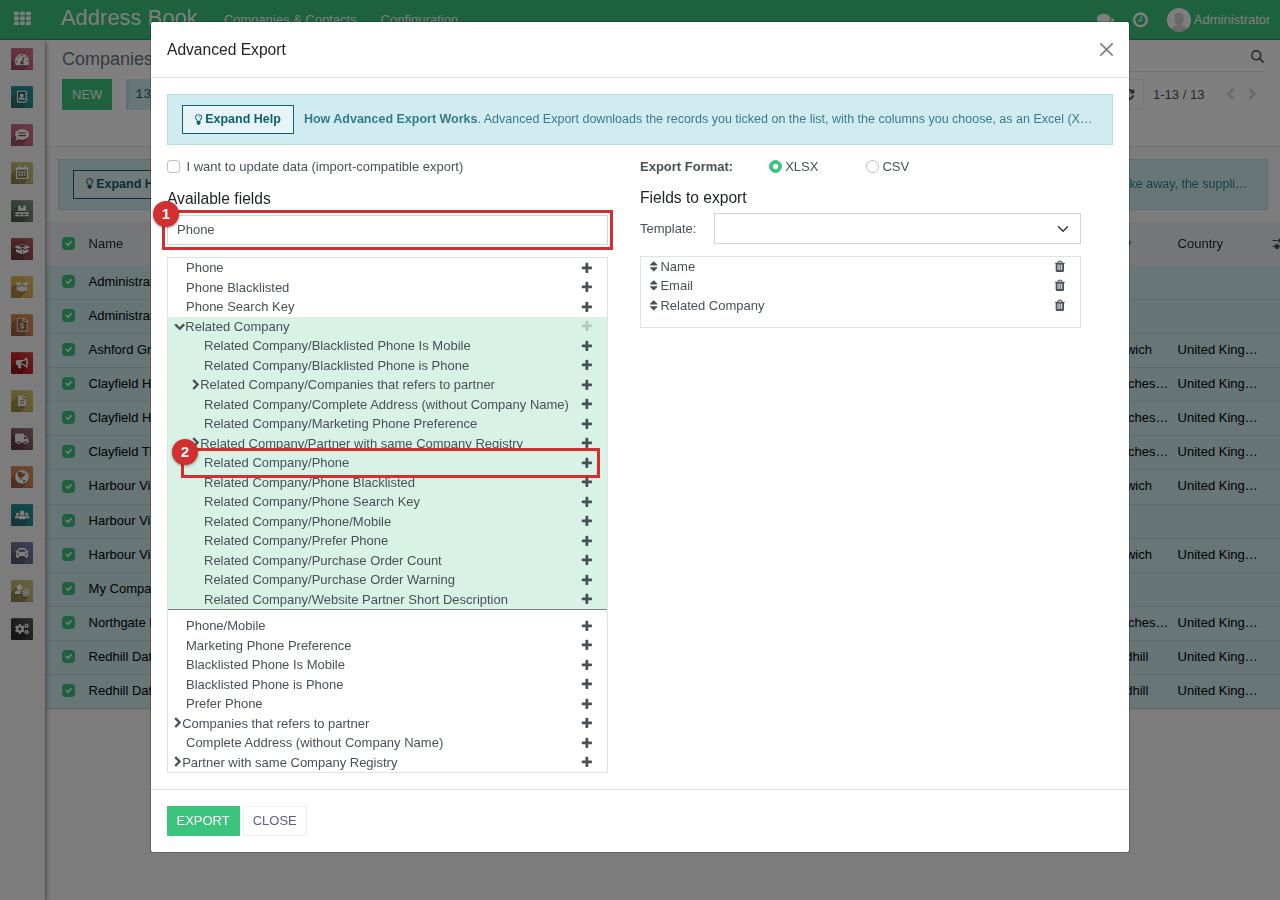
Drag a column by the arrows beside it to change where it comes in the file.
4. Save the columns as a template
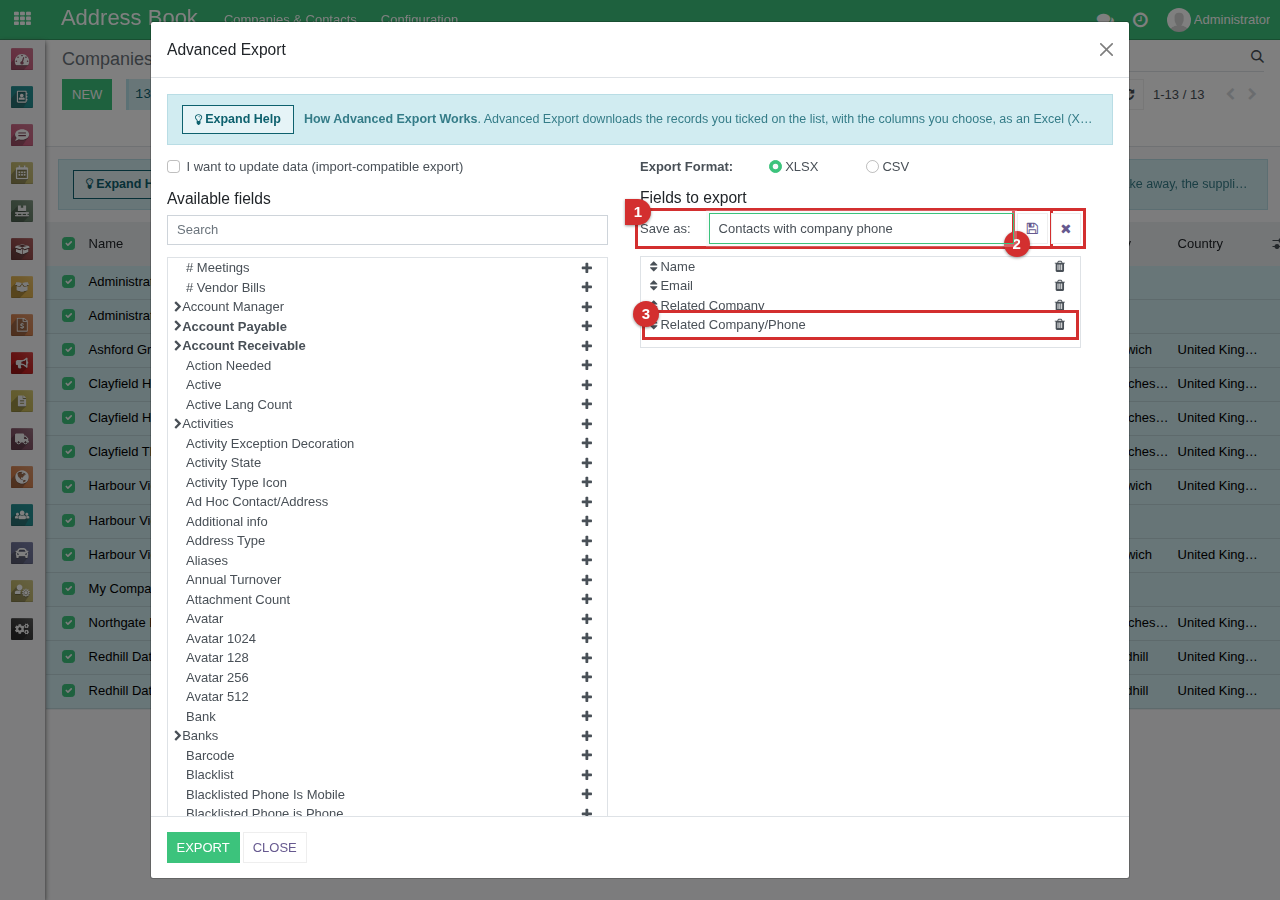
To use the same columns again, choose New template in the Template box. Type a name (1), e.g. Contacts with company phone, and click the save button beside it (2). The template keeps every column under Fields to export, Related Company/Phone (3) included. Next time, pick it from the Template box and its columns load for you.
5. Export
Leave Export Format as XLSX, which Excel opens with leading zeros and dates exactly as they are, and click Export. The file has one column for each field you chose, and one row for each record you ticked. Some of its rows:
| Name | Related Company | Related Company/Phone | |
|---|---|---|---|
| Daniel Reeve | accounts@example.org | Harbour View Academy | 01473 000299 |
| Priya Shah | priya.shah@example.org | Harbour View Academy | 01473 000299 |
| Marie Okonjo | marie.okonjo@example.com | Redhill Data Services Ltd | 01737 000100 |
| Jane Briggs | jane.briggs@example.net | Clayfield High School, Clayfield Theatre |
Jane Briggs works at a Site, Clayfield Theatre, which has no phone number of its own, so her company phone is blank. Companies have no Related Company, so their rows leave those two columns blank.
Things to know
- CSV is for other systems that need it. For anything you will open in Excel, use XLSX.
- Deleting a template - with the bin beside the Template box - deletes only the saved set of columns. No records are changed.
- I want to update data (import-compatible export) is for changing records in bulk and importing them back: see Updating Existing Data using a Data Import (opens in a new tab).