Overview
- RecyclyERP integrates with a service called PrintNode to print directly to label and document printers in your offices and elsewhere.
- You will need to sign up for your own PrintNode account, and then enter your PrintNode API Key into your RecyclyERP system.
- Note that any below references to / screenshots of PrintNode may change, and that RecyclyERP does NOT support PrintNode.
A. Sign up for a PrintNode account and install the PrintNode app
1. Go to https://www.printnode.com/ (opens in a new tab) and click the appropriate button to create an account

2. After signing in, you will be taken to the PrintNode dashboard

3. Follow the link sent to your email to verify your email address and activate your PrintNode account
4. While on the PrintNode website, click the Downloads section on the left and download the file appropriate for your setup

5. Run the file to install PrintNode on the server connected to your printer(s), ensuring that the option to Install as a Service is NOT selected
Repeat this step on ALL servers which have printers connected
Note that you do NOT need to install PrintNode on clients (i.e. on any other users' machines) that you wish to print from
B. Check that PrintNode has picked up the correct printers
1. Run the PrintNode app and login with the user credentials you previously used
Note that after logging in, PrintNode just disappears into the system tray (the set of icons near the clock) after logging in
2. Find the PrintNode icon and double-click to open it
3. Go into the Printers tab to check the correct printers have been added
This will list all printers available to the server / pc you have installed the app on.
Untick any printers that you don't want to be available

C. Get an API key from PrintNode for RecyclyERP to link with
1. While on the PrintNode website, select the APIs keys from the top menu
2. You'll be prompted for your account password - use the same one as you set earlier
3. For the API Description, enter something suitable, e.g. RecyclyERP, and then click CREATE to generate your API key
D. Enter your PrintNode API key into RecyclyERP and check for correct printers
1. In RecyclyERP, go into Users & Settings > Settings, and find the PrintNode settings in General Settings, under the Recycly Direct Printer Integration heading

2. Copy the API Key you generated earlier into the PrintNode API Key box in RecyclyERP
3. Click the green Save button at the top-left
4. Find the Recycly Direct Printer Integration section again and then click VIEW PRINTERS to check that RecyclyERP has correctly connected to PrintNode
If you add a printer in PrintNode later, click Sync Printers to fetch it into RecyclyERP.
E. Set default Document and Label printers, and any overrides per Template and/or user
1. In the same Recycly Direct Printer Integration section, set the Default Printer for Labels and Default Printer for Documents
Note that these are applied only when not overridden at Document/Label Template level and/or User level, as explained below
2. To override the default printer per label template (often useful for specific labels), while in RecyclyERP, find the specific label template and, on its Printer Settings tab, set Default Printer for Labels created from this Template (overrides above)
The table beneath it sets a printer for specific users of that template.
Note that only label templates with PDF Action set to "Print PDF / open print dialogue" will have the Printer Settings tab. Despite its name, this option prints straight to your PrintNode printer. It only opens your browser's print dialogue if direct printing is unavailable, for example when no printer is set or the printer is offline.
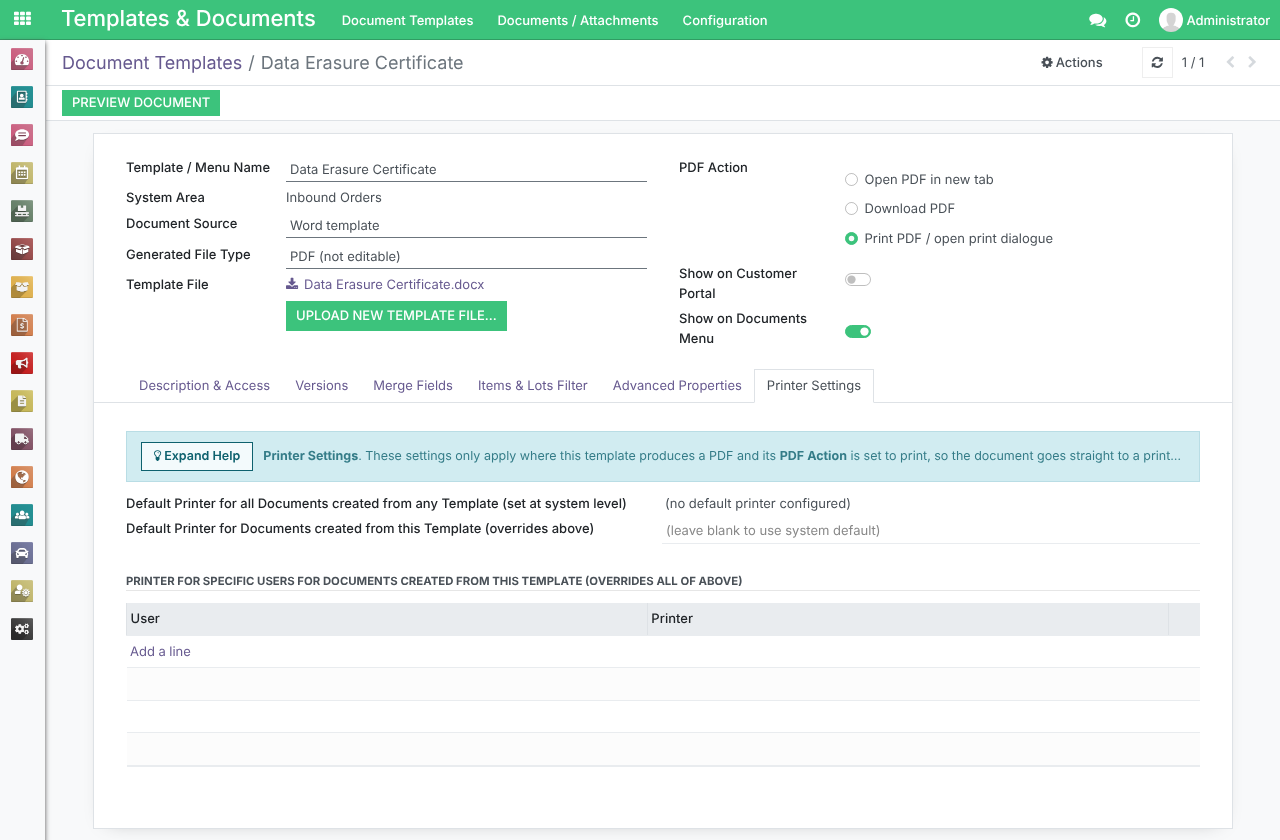
3. To override the default printer per document template, while in RecyclyERP, find the specific document template and, on its Printer Settings tab, set Default Printer for Documents created from this Template (overrides above)
The table beneath it sets a printer for specific users of that template.
Note that only document templates with PDF Action set to "Print PDF / open print dialogue" will have the Printer Settings tab. Despite its name, this option prints straight to your PrintNode printer. It only opens your browser's print dialogue if direct printing is unavailable, for example when no printer is set or the printer is offline.
The template's Generated File Type must also be "PDF (not editable)", because PDF Action only appears on PDF templates.
4. To override the default printer for document or label templates for a specific user (often useful when working in different locations but using the same templates), while in RecyclyERP, go into Users & Settings > Users, select the specific user, and configure your overrides

Additional notes
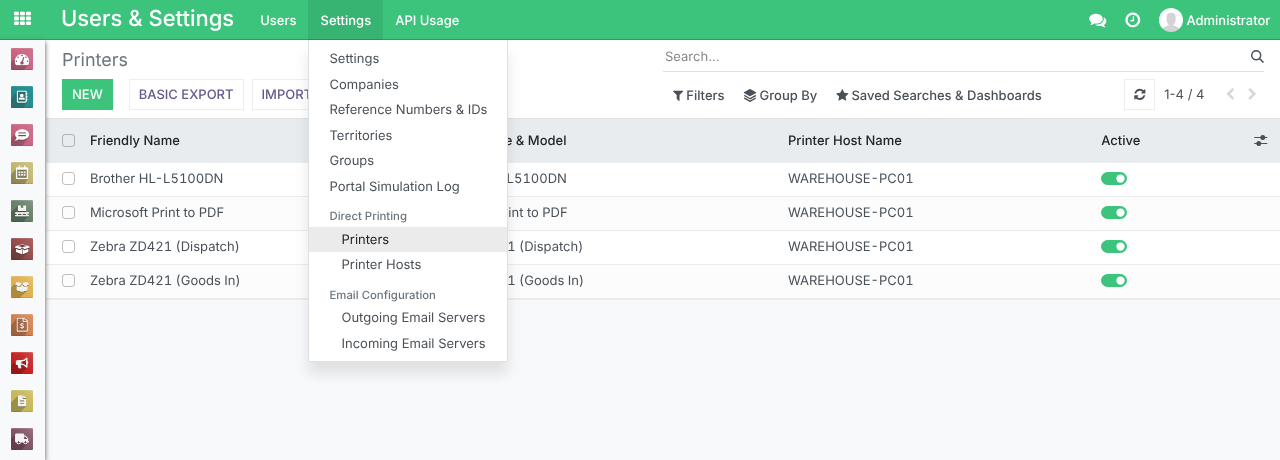
Admins can toggle whether Printers are active or not via Users & Settings > Settings > Direct Printing > Printers
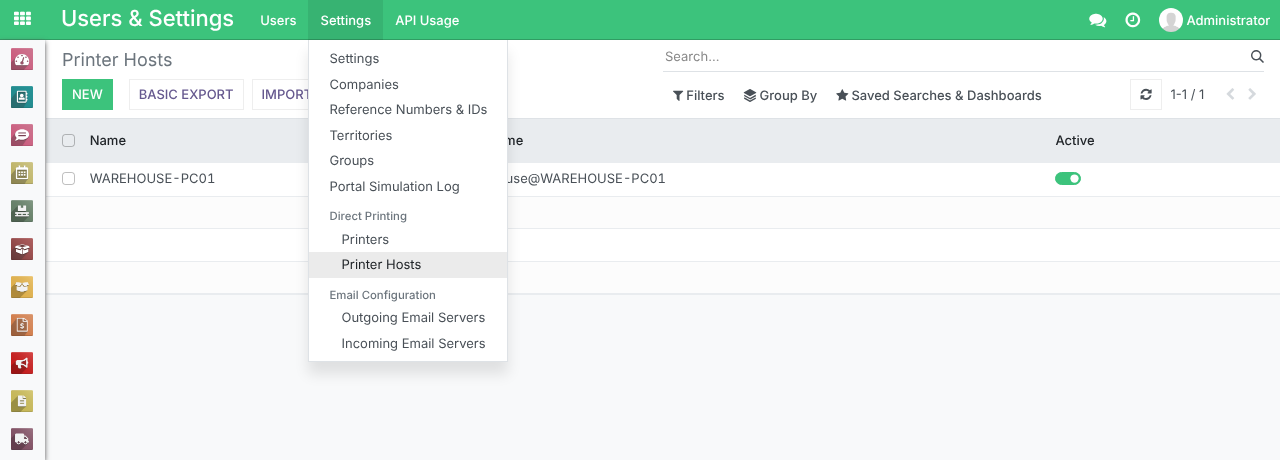
Admins can toggle whether Printer Hosts are active or not via Users & Settings > Settings > Direct Printing > Printer Hosts